That bumpy spray above you doesn’t have to age your rooms forever. Once asbestos is ruled out, a fast, safe plan can erase the texture and lift light. With basic gear and care, your ceiling goes from dull to clean. A weekend, some water, and steady steps deliver a smooth, modern surface without fuss. Dust stays down when you prepare right, because coverings and tape trap debris. The payoff feels instant, while the method stays simple.
Safety, tools, and smart prep for a clean ceiling overhaul
Start with safety. If lab tests confirm no asbestos, gather a ladder, drywall knife, floor blade scraper, paper or plastic sheeting, painter’s tape, trash bags, and a shop vacuum. With these on hand, your ceiling project stays orderly, because each tool reduces mess, speeds work, and protects surfaces.
Protect the room well, since cleanup depends on containment. Cover the floor fully, then tape edges tight to form a catch-all. Shield fixtures, vents, and outlets. Keep lighting bright but safe. Good coverage stops water drips, traps slurry, and makes bagging debris quick when scraping begins later.
Plan your path across the room, because small sections control pace. Work left to right and mark finished zones. Keep the vacuum ready between passes to tame dust. Short breaks help you check the surface, adjust pressure, and save energy while avoiding nicks in drywall and edges.
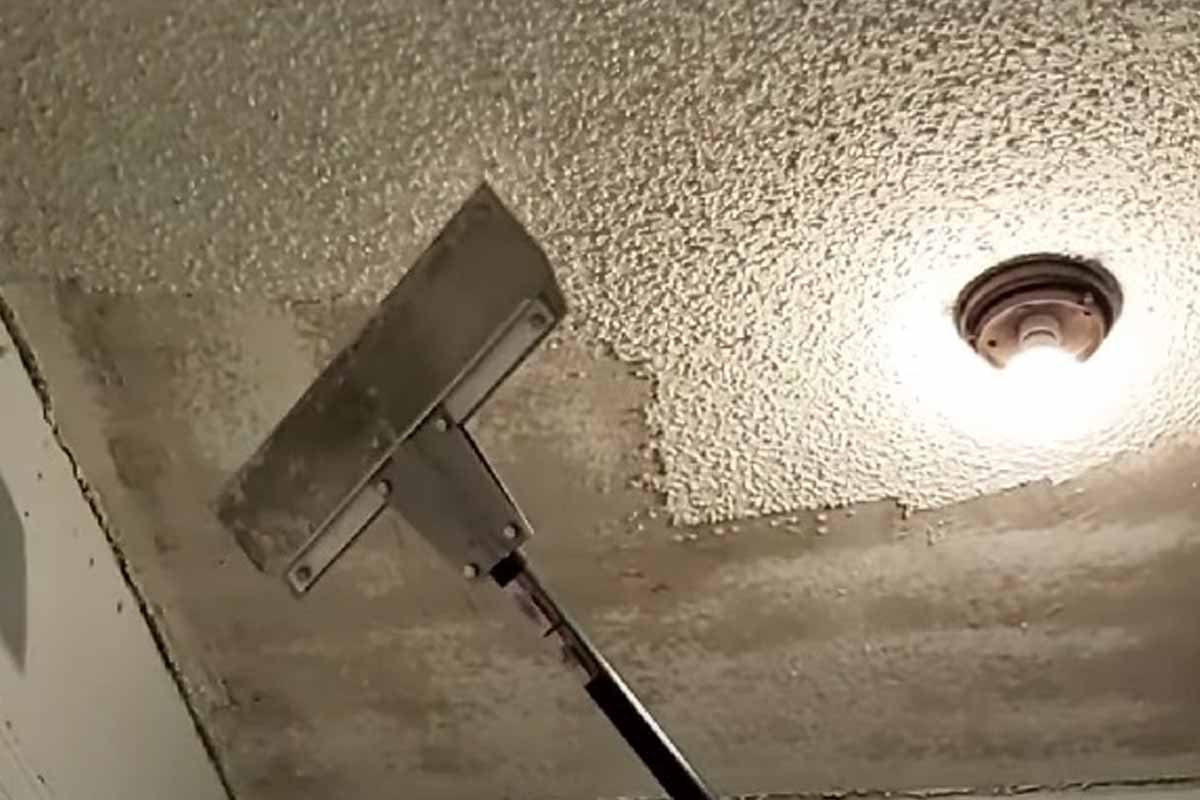
Scraping strategy for unpainted and painted textures
If the texture was never painted, mist the surface, wait a few minutes, then scrape. Gentle, even strokes prevent gouges while the dampened popcorn falls in ribbons. Stay patient so the ceiling reveals a flat base, since water softens peaks and keeps dust down as you move.
Paint changes everything because it seals the bumps. Start dry. Use the scraper to break the film and score stubborn ridges. Then mist lightly and let the moisture sit several minutes. That pause allows penetration through layers, which reduces force, limits fatigue, and avoids tearing paper below.
Some rooms have many coats, so repeat the dry and wet cycles. Work in lanes and re-mist as needed. If progress stalls, pause five minutes and test another patch. Fresh edges often lift faster, because the seal breaks cleaner after small cuts relieve tension in the surface.
Containment, room setup, and smooth workflow
Shut down heating and air conditioning to stop dust from spreading. Remove furniture or move it out from walls. That small effort saves hours later, because returns stay clean. With vents sealed and pathways clear, your ceiling project flows better, and trays catch more debris during cleanup.
Lay plastic or builder’s paper wall-to-wall, then tape the perimeter tight. Press seams firmly, because moisture loosens weak bonds. Create raised lips at thresholds to trap slurry. Place bins for waste nearby. Bag often. Frequent clears keep footing safe, so the work stays steady and less stressful.
Use a pump sprayer for reach, while a hose and container work in tight spots. Adjust nozzle from mist to stream as texture changes. Keep goggles on, since wet grit drops without warning. A snug mask blocks fine dust, and old clothes or a disposable suit protect skin.
Timing, water saturation, and a polished ceiling finish
After the first passes, re-wet the surface and wait ten minutes or more. That deeper soak softens stubborn peaks and joints. Then scrape with long, calm pulls. The ceiling usually levels fast at this stage, as softened texture shears clean and drops neatly onto your protective sheets.
Once bare, check for nicks and seams. Skim light compound over flaws, then sand smooth. Prime next, because fresh drywall drinks paint. A low-sheen coat hides small waves, while bright white lifts light. Many owners stop here, since the room already looks bigger and calmer and lighter overall.
Style can still evolve, because coverings change mood quickly. Boards in a simple shiplap pattern add warmth, while clean panels read sleek. If scraping ever feels like too much, seven practical covering routes exist. Each hides texture, saves effort, and avoids slurry, while still updating the space.
When to call a pro and smart alternatives
If testing finds asbestos, stop. Hire a licensed abatement team, because health outweighs speed and cost. Pros seal rooms, filter air, and handle disposal. Skip DIY in that case. When results show a safe ceiling, proceed with confidence, and keep the room closed until dust settles after work.
Time the job for a free weekend. Ask for help with setup and cleanup, while you handle scraping. Two steady days usually finish a typical room. Short, regular breaks reduce strain. Good playlists help pace. Simple habits add up fast, so progress stays clear and morale stays high.
Afterward, sand lightly and prime, because paint clings better on a sealed base. Choose flat or matte for calm light, or eggshell for durability. Clean vents and change filters. Vacuum gently along tops of trim. Small touches lock in gains, and the room keeps its fresh look.
Simple steps today that leave rooms brighter for years
Clear tests, careful prep, and calm passes turn heavy texture into smooth planes fast. Water, patience, and smart cleanup keep dust down and energy up. With basic gear and safe habits, your ceiling stops dragging the room’s mood. The space looks open, the light travels farther, and you own the result. Weekend work pays back every day you live there. The upgrade feels timeless, maintenance gets easier, and value rises with a cleaner look. That’s a win you can see.